Hi everyone, been quite some time since I have blogged anything.
Anyway, the fish pond is still going fantastic, up to around 40 in there now.
I have been busy working for myself the last 5 or 6 years building my craft units.
The business has not slowed since I started and have trouble keeping up with it all at times.
Please check out this link to my You Tube video, which gives you an idea what I have been up to.
https://youtu.be/QJCoIdgQf2w
This is an example of what I have been doing.
Happy Days
Col
Friday, June 1, 2018
Friday, April 6, 2012
Pond Update
Some new pics of the pond, really kicking on now. The fish have spawned many times this season and we now have around 15 new additions.(without separating the fry from the pond) The eco system is working great and all the fish are very healthy.
Monday, October 3, 2011
Pond update....stage 3
Hi, now that the pond was ready for filling, all i needed was some rain to fill my tank....and rain it did. The tank was full in no time and overflowing, on with the raincoat, and released the tank water into the pond. In a few short hours it was full...and the tank still filling...had a bucket load of rain that day. Once the weather cleared it was time to secure the liner edge with rocks and also make some minor adjustments to the ground work and waterfall. When setting up the falls, i didnt want a roaring torrent...so when i set up the header pond, some of the water would return to the pond behind the rocks and the rest would run a pleasant trickle over the fall rocks. This worked out very well. A few plants were added (more to come) and quartz stone added as a border and also to secure and hide any gaps.The electrical side of things was now completed and the pump and bio filter were doing their job,some lights were also added beneath the walkover.
Sunday, October 2, 2011
Pond update
Now that the hole has been dug and the waterfall formed up, it was time to get ready to install the liner.Before this however i made a couple of pathways in sides where later, a bridge is to be built. Sand was used as a base, about an inch thick and partially up the sides. The sides i used layers of packing foam (the spongy stuff), for the waterfall, old carpet was placed over the bricks and layers of cardboard in the header pond. Carefully placing the liner in the hole, it was unfolded and roughly pushed into shape supported on the edges with rocks. The waterfall rocks were stacked up to the header pond. I was lucky to have a heap of rocks around the place to use, saving me a bit of money.
Saturday, October 1, 2011
Building the pond
Hi, well finally started building my fishpond with waterfall. Bought a pond kit which had 6m x 3m liner, bio filter and pond pump. Once i decided where the pond should go, it was digging time! I marked out the shape with line marking paint, this made things a lot easier. I decided on a depth of around 400mm at the waterfall end and around 350mm at the other. Nothing really fancy about this pond, pretty basic, but was still hard work! Pond around 2.5 mtrs long x about 1.5 mtrs wide, this allowed plenty of overhang for the liner.
Monday, September 19, 2011
Out with the old!
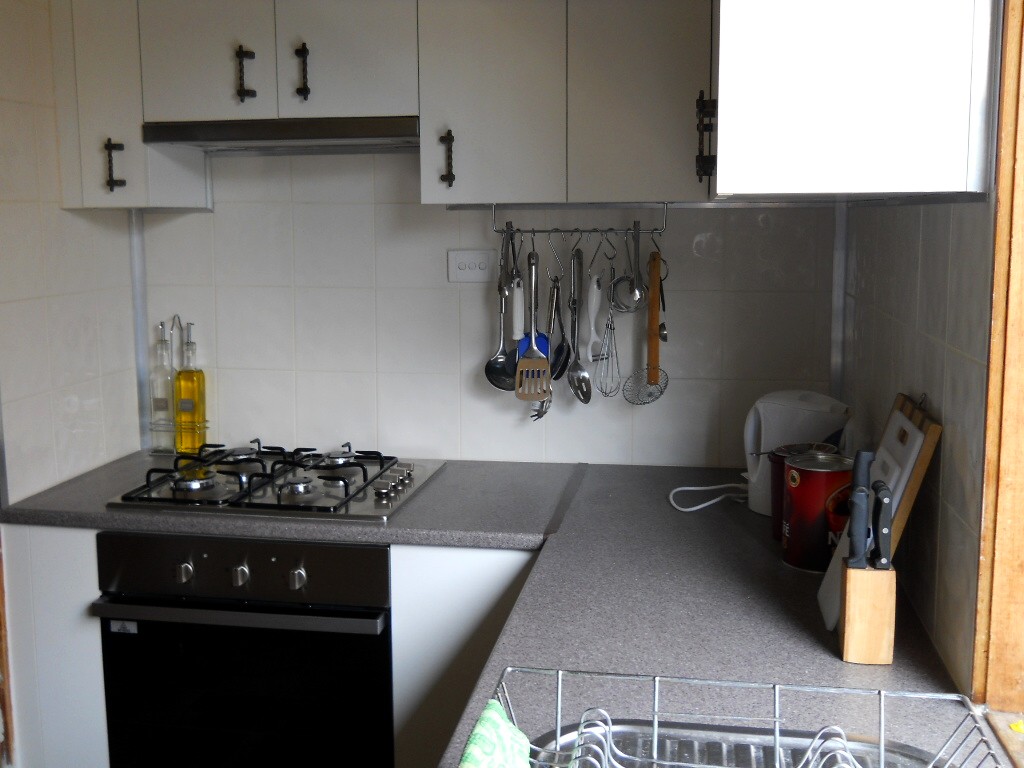
Hi, as i mentioned in previous post i would show some pics of the kitchen makeover. This is how it used to look.....nice country kitchen?...no! These cabinets been in for at least 70 odd years! One was signed on the back..A.Clark 1944! They were not in the best condition, so, time to update! I purchased a flat pack kitchen from the local hardware store...would have built my own if i had the right equipment. Anyway...out it came.

The new cabinets had to be assembled, this was a breeze, soon it was beginning to take shape.
Installing was also a breeze, just being sure everything was level. A Real problem with the old kitchen was the sink location....wrong sink, for the wrong cupboard and jammed away in the the corner...not very user friendly! So i repositioned the sink to a more central location...bought some flexible pipe extentions and moved the waste pipe. Also in this upgrade was the replacement of the gas stove with an electric under bench oven with gas cooktop and also a slide out rangehood .time to get the plumber! The stove was disconnected and removed so i could install remaining cabinets. Once the plumber reconnected the gas, and oven was installed it was time for the tiling.
Cement sheets were attached to the wall, and i set about cutting and fitting tiles. Had a few tricky power points, but with a hand cutter that fits into a hacksaw, everything went to plan. Once tiles were up they were grouted and silicon used on the expansion gaps (corners etc) To finish off i used aluminium angle in the corners and under the overhead cabinets, just for something a little different. Handles were used from the old kitchen and gave the modern a little country feel. Happy days :)

The new cabinets had to be assembled, this was a breeze, soon it was beginning to take shape.
Installing was also a breeze, just being sure everything was level. A Real problem with the old kitchen was the sink location....wrong sink, for the wrong cupboard and jammed away in the the corner...not very user friendly! So i repositioned the sink to a more central location...bought some flexible pipe extentions and moved the waste pipe. Also in this upgrade was the replacement of the gas stove with an electric under bench oven with gas cooktop and also a slide out rangehood .time to get the plumber! The stove was disconnected and removed so i could install remaining cabinets. Once the plumber reconnected the gas, and oven was installed it was time for the tiling.
Cement sheets were attached to the wall, and i set about cutting and fitting tiles. Had a few tricky power points, but with a hand cutter that fits into a hacksaw, everything went to plan. Once tiles were up they were grouted and silicon used on the expansion gaps (corners etc) To finish off i used aluminium angle in the corners and under the overhead cabinets, just for something a little different. Handles were used from the old kitchen and gave the modern a little country feel. Happy days :)Tuesday, September 13, 2011
Going up the Country....
Hi all, well its time for a whole bunch of new projects as we have sold our house and made the big move to the bush. Although we bought an older style house, it has had a lot of work done already. Got a heap more land space, so its going to be a great challenge. So far i have installed a water tank and replaced the kitchen (photos will be up soon) Really looking forward to creating another fish pond and fernery, but this one will be bigger and better! when i start i will post stage by stage photos. This time i will be using a pond liner rather than a pre formed pond....got all the gear...just a matter of starting on it now..happy days :)
Monday, February 7, 2011
How does your garden grow
Hi, just thought i would share some new pics of my garden.....really coming together now.Below the front yard, which is coming along
Sunday, December 5, 2010
Backyard and fishpond
Hello all, thought i would let you know what i have been up to. The garden going well, especially the ferns which look fantastic. Since i last posted, i have put laser lite on the pergola roof, set up the guttering and downpipe (PVC) so when its rains the water from the pergola roof is sent to the pond. This is working very well, the pond gets a good flush out with natural rainwater, the pond cannot overflow as i have an outlet which when reached flows excess water to the stormwater pipe. The water tank is all hooked up and plumbed ready for use on the garden and to top up the pond in the warm months ahead. To my surprise the fish have spawned twice recently, a good indication they are pretty happy.I must say it is now the one thing i look forward to most after a day at work, just to sit out on the pergola amongst nature and relax...till next time, stay happy :) P.S. I composed, performed and recorded the music on this clip with my MR8 recording studio :)
Sunday, August 15, 2010
The Final Frontier!
Friday, July 30, 2010
Tanks a lot
Hi everyone, well finally got my water tank, a 2030 litre, colour matches my house trim, also an ALKO water pump for around $1000 AU...(all up) Can't wait to get it hooked up and start storing some H20 for summer. Primary use of this tank will be to keep the fish pond topped up during the hot summer months, and also to give the garden a water too....Preparation of the install site was done a little differently than the norm...firstly i excavated the depth to about 250mm...layed a 100mm thick layer of crushed rock and compacted well, then carefully levelled the area for the bricks i used to bring it to ground level...i have a heap of these bricks to use up, so i thought why not? Time will tell if it was a bad decision or not, but i think it will be ok...will put up further posts when i get to the fun bit...playing with pipes, cheers
Sunday, June 20, 2010
Weather
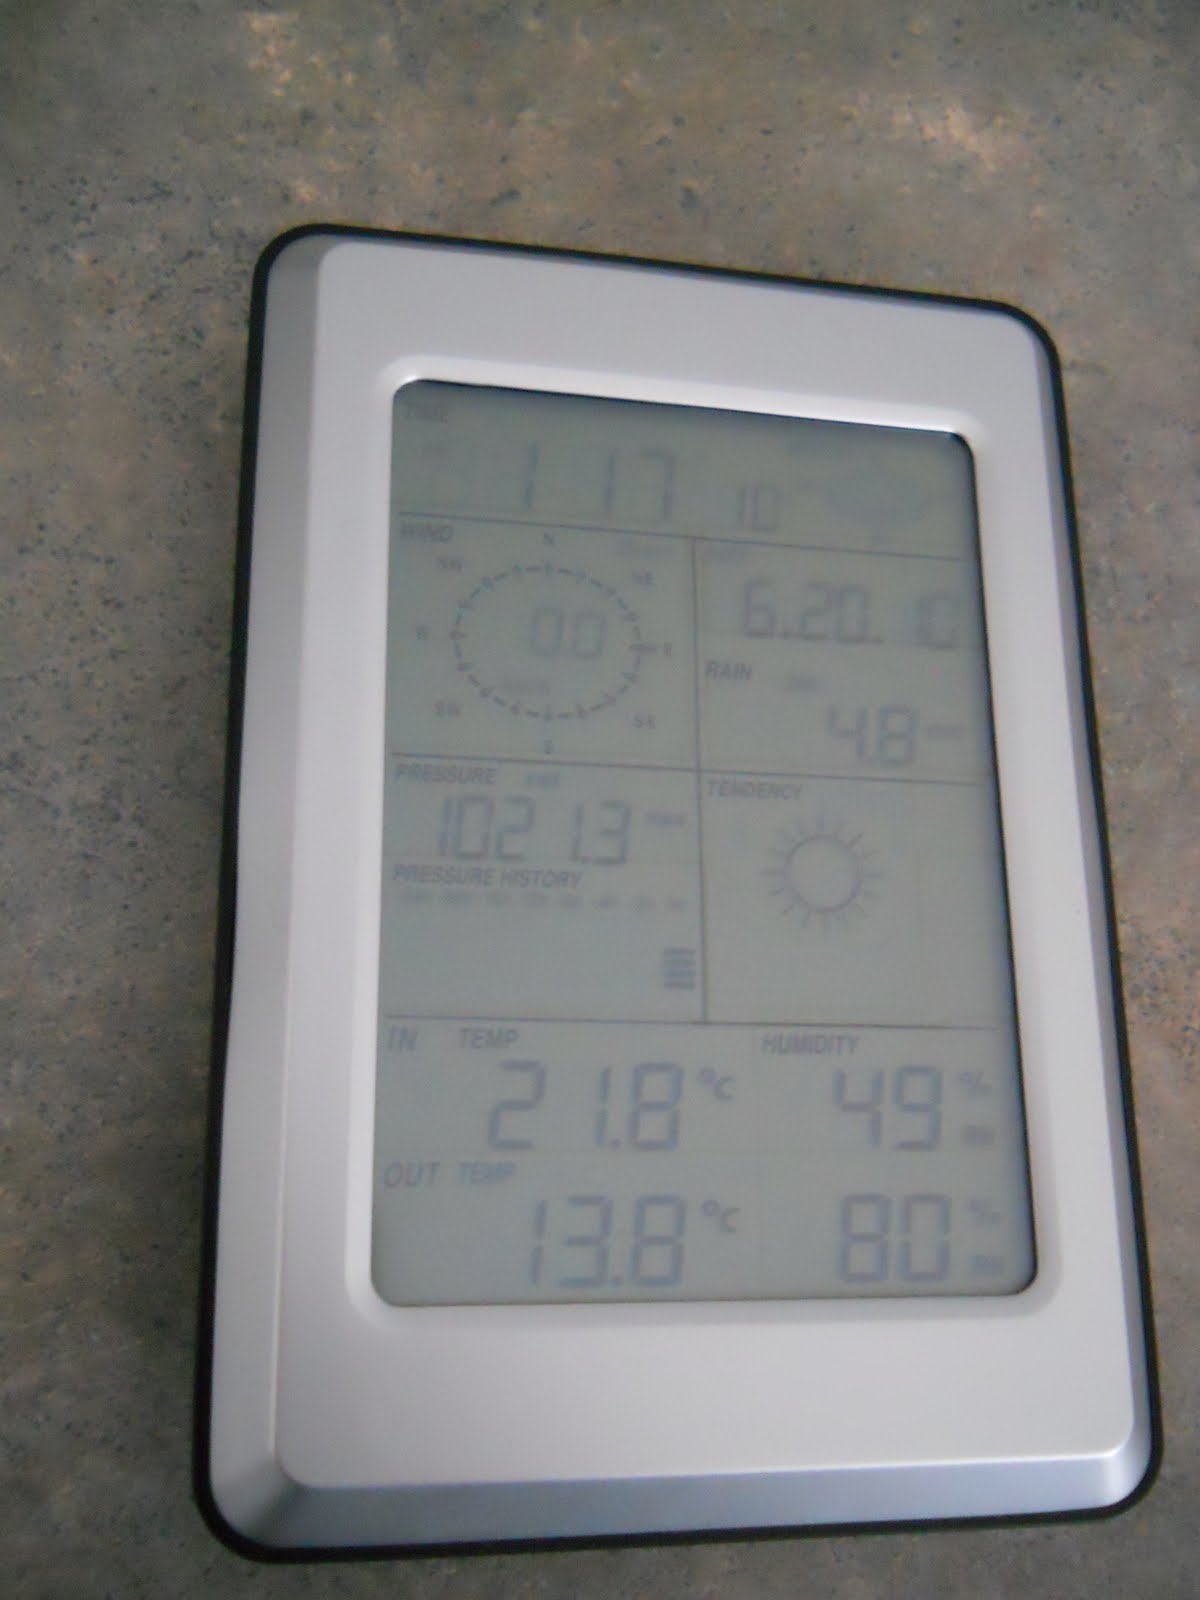
Hi, been awhile since i have posted anything, but cant do much if the winter weather isnt kind...so, here i was thinking about the weather and decided to get a wireless weather station so i can get an idea what would be in store.I purchased one on ebay for around $115 AU and when it arrived, eagerly set about installing it. A few things i had to consider before installation, some height was needed, it only comes with a 700mm pole so it was either on the pagola roof or another pole in the ground. But i decided to incorporate it into my existing wishing well, the height was ok, plenty of open space for the rain gauge, the only problem was the temperature gauge which is recommended to be shielded or in shade for correct temp reading. Well i had the shade under the roof of the well, so thats where i fitted the temp and air pressure gauge.The information unit which is inside the house, displays all the information needed for any would be weather buff. It really is an amazing little set up...wind speed, wind direction, rainfall, air pressure, inside temp, outside temp, inside and outside humidity, weather tendency feature looks ahead on all gathered info and displays the weather tendency for the next 24 hours or so. The unit is also capable for computer connection to store and compare weather stats collected and also has the time and date! 4 AA batteries ( 2 in outside unit 2 inside) run the wireless side of things....no worries about running wires everywhere, just a few simple connections on the outdoor unit on setup and thats it. The inside unit is touch screen for easy setup, of which most are already set.
Sunday, May 9, 2010
Garden Update
Hi, thought i would show a few more pics of the garden, really taking off now since the weather cooled down a bit. Also added this amazing LED light to the pergola above the pond, really does the job ( will post night pics later) Some pics of the plants blooming in flower at the moment and a pic of my favorite fern, love this thing, growing bigger by the day! not to mention the kangaroo paw which is spectacular right now.
Sunday, April 18, 2010
Effects
Hi, today i thought i would talk more music. To compliment my electric guitar, i use a stomp box with built in wah wah pedal by berringer (v-amp).It has 99 pre set effects but is also fully programable to create that unique sound. My amplfiers also in this pic are a 15 watt ibanez practice amp and a 40 watt weconic.. these are more than enough for my sessions at home, both have also built in effects, which i rarely use now i have the v-amp. Next, i have downloaded a mixing program called Mixcraft 5 to my pc, so i can multi-layer tracks using different effects and instruments, should be fun, have to get the right connectors first from guitar to pc.., maybe i will do the backing track to my videos..happy days...
Sunday, April 4, 2010
Guitars
Subscribe to:
Posts (Atom)